Monday, December 12, 2011

~ Christmas ~ Show me your Christmas Decor - Here is mine!


I love decorating my house for Christmas!  Here is my 'Gold' Christmas tree. I've been collecting ornaments for years. Some of these are more than 10 years old.  Every year after Christmas when they go on sale I buy some and save them, so every year I have something new. 


I made these ornaments myself using Styrofoam balls, fabric, ribbon and rhinestones.
I got the template from Martha Stewart Crafts. I love them!!


 This is my dining room. I decorated the stairs with garland and flowers.

 
And here is our colourful real pine tree decorated with Disney ornaments.
My daughters' favourite one.


 I had to start a new collection, the other tree was almost full :) 


Now would you show me yours? Send your pics to party-tales{at}rogers.com and I will show your decor for all of us to see. 

I will show you my outdoor Christmas lights tomorrow - Taking pictures tonight! 


~ DIY Tutorial ~ How to use party printables to make cupcake toppers, tags and water bottle labels


How to do cupcake toppers, treats and favors tags using the party circles:

  I had already posted some of this info in different posts but since I am getting a lot of questions on how to use the party printables, I decided to do a separate post about this. 


Favors and treat tags:  Download and print file on white card stock paper, my designs are done to fit on a letter size 8.5 x 11 paper, cut into squares or use a paper punch of your choice.  After you have punched out your party circles, make a small hole punch to insert your ribbon.


For cupcake toppers, download and print file in white card stock paper, cut into squares or use an scalloped or circle punch and attach to 4" lollipop sticks {available at Michaels, Waltmart or Bulk Candy store} using tape or a small white circle labels.

You can make napkin rings too. Take a look at how I made these using party circles, ribbon and double sided tape.

Ever wonder how to affix water bottle labels?


Print your digital file in regular letter size 8.5"x11" paper, cut labels and attach using double sided tape {This is the easiest way but only works if water bottles will be served at room temperature, otherwise ink will leak from the labels}. You can also print them in full size sticker sheet {available at Business depot, office depot...}

Now if you want to make them waterproof and place them in buckets with ice, an easy and economical way, rather than buying waterproof labels, is to use clear packing tape, the width of the tape is exactly the same size as the labels. Laminate both sides of the label with the clear packing tape and then use the double sided tape to affix to the bottle. This way the ink won't leak.

You can also just attach the label to the bottle with double sided tape and then go over with the clear tape, you will be saving one step but only the top will be waterproof, I've done it before and my bottles were fine when placed in ice, but I recommend to make a trial run and place your bottle in a bucket with ice to check if water goes through. But just to make sure the ink won't leak with the last method, and you still want them in ice, just insert the bottles half way where the ice cubes don't touch the labels and the water will still be kept cold.


Friday, December 9, 2011

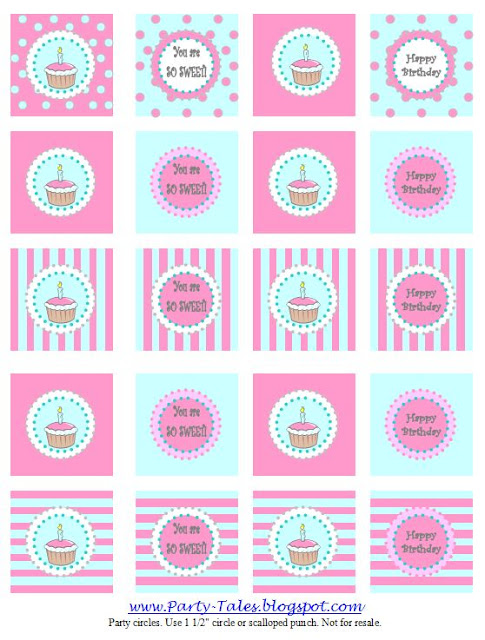
~ Party Printable ~ Cupcake toppers and Invitations {Free download}

I designed these cupcake toppers for a sweet girl who turned 11 a few weeks ago.  She had a few friends over her house to bake and decorate cupcakes.  These mini party circles can be used for favors tags as well.  Just print on cardboard paper, use a 1 1/2" scalloped or circle punch and attach to lollipops sticks.  

Click here for ideas on how to use these party circles


I also made matching invitations, and you can use them too. I edited the file and left some blank space just so you can add your party details.

Tuesday, November 22, 2011

~ DIY Tutorials ~ Rice Krispie Pops "Little Pirates"


Here are the instructions on how to make these cute little pirates pops: 


To make the pops you'll need:
  
Round Cookie Cutter 
Candy wooden sticks
Parchment Paper
Icing decorating tubes {red, white and black}
Treat bags and curling ribbon to wrap pops  


50 ml
1/4 cup
margarine or butter
250 g
1 pkg
(about 40) regular marshmallows or 5 cups miniature
2 ml
1/2 tsp
vanilla extract (optional)
1.5 L
6 cups
RICE KRISPIES CEREAL
 
Preparation
  1. Melt margarine in large saucepan over low heat. Add marshmallows and stir until completely melted. Remove from heat.
  2. Stir in vanilla. Stir in RICE KRISPIES cereal until well coated.
  3. Using lightly buttered spatula, press into buttered round cookie cutter over parchment paper.
  4. Wait a few minutes and insert Candy sticks before they dry completely
  5. Let dry and decorate with Icing decorating tubes {Usually available in the baking section of the supermarkets or specialty store like bulk candy or Michaels}, let dry completely at least 6 hours before wrapping.


You can also make your own royal icing with the mix like shown in the picture above but then you'll need colouring gels, piping bags and tips.

 Now you can use any cookie cutter to make any rice krispie pops to match your party theme. 

 
Really easy and yummy!


  All of the pirate printable collection now available at my Etsy store.

 
These boy party ideas were also featured on Spaceships and Laser Beams.

Monday, November 21, 2011

~ Birthday Party ~ Pirates!! 1st birthday party and Pirate pops Tutorial


 I've been meaning to post these pictures for a while. Ivano turned one in October and his mom and I thought a Pirate Party was the perfect theme to celebrate his birthday. 

I had so much fun planning all the details of this party and I love how everything turned out!


 Ivano loves balloons and we had tons of them!


 We wanted to have a "cute" rather than "scary" pirate theme,
that's why we chose the color palette to be sky blue, white and red.  


I made the cupcakes and designed the cupcake toppers to match the decor.


I made the most adorable rice krispie pops in the shape of little pirate faces
{Tutorial here}


The tables were decorated with tons of chocolate gold coins, pirate eyepatches,
 gold necklaces and gold wrapped Hershey kisses {pretend gems}.


 I also made the water bottle labels to match the pirate party theme.


We wrapped the party favors in white and red stripes paper and decorated with a raffia bow and made to match Thank you tags.  

 All of the pirate party supplies were purchased at the party packagers here in Canada.
 Pirate party supplies can be also purchased online at Birthday express.   

  All of the pirate printable collection now available at my Etsy store.

 
These boy party ideas were also featured on Spaceships and Laser Beams.
Related Posts Plugin for WordPress, Blogger...